[Solved] Easy Way To Create Bootloader All / Multi OS like Win 8, Mac OS X (e.g 10.8.2 & 10.9.1) With Linux Grub (Setting) [Hackintosh]
Hi All, today we have publish tutorial about “[Solved] Easy Way To Create Bootloader All OS With Linux Grub (Setting)” On Local HDD / Harddisk, so it can booting without CD drive or USB Flash drive. It’s solve / to fix “Boot0: Error” problem to be “Boot0: done“, and I thinks, it’s very simple way using Linux Grub more than using chameleon, chimera, clover etc as boot loader All OS like : Win 8, Mac OS X (e.g 10.8.2 & 10.9.1) and then Linux”. (Linux Grub Bootloader Vs Chameleon Vs Chimera !) 😀
Note : Recommended Using version Linux Mint >= 10.
Preview 1 (Display Bootloader With Linux Grub) :

Display Bootloader With Linux Grub
- Install All OS like : Win 8, Mac OS X (e.g 10.8.2 & 10.9.1) and then Linux (I’m using Linux Mint). 😀
- For activate boot loader Mac OS X, change as root this default file setting boot loader on Linux System (/boot/grub/grub.cfg) like this :
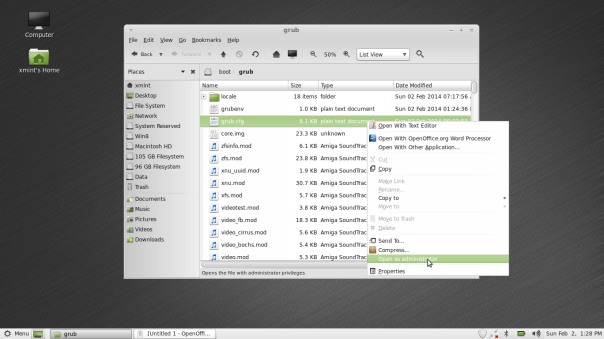
1. File grub.cfg on Linux Mint File System
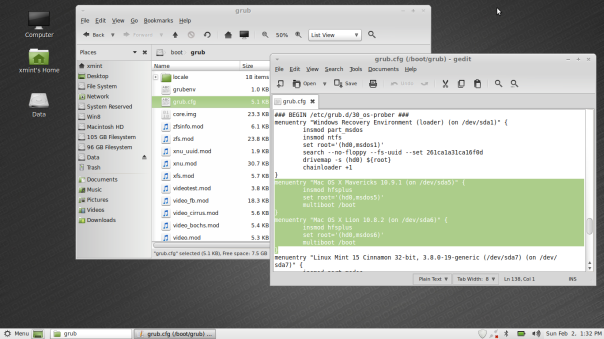
2. Open File grub.cfg on boot_grub_grub.cfg
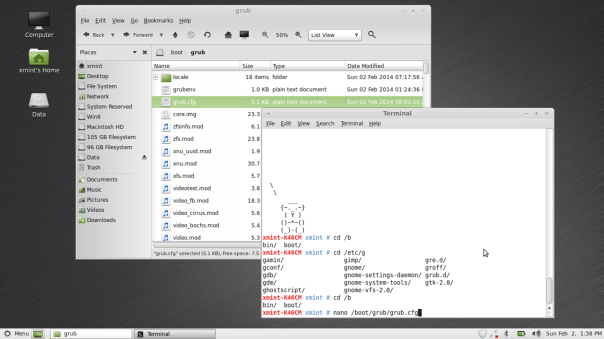
3. Open and Edit grub.cfg with nano Editor_
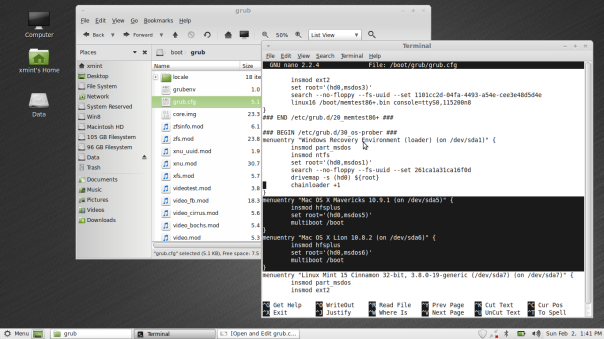
4. Edit grub.cfg with nano editor
Default Setting :
=== Start : Default boot loader Mac OS X Mavericks 10.9.1 : ====
menuentry “Mac OS X (32-bit) (on /dev/sda5)” {
insmod part_msdos
insmod hfsplus
set root='(hd0,msdos5)’
search –no-floppy –fs-uuid –set fafd580685dce5a5
load_video
set do_resume=0
if [ /var/vm/sleepimage -nt10 / ]; then
if xnu_resume /var/vm/sleepimage; then
set do_resume=1
fi
fi
if [ $do_resume = 0 ]; then
xnu_uuid fafd580685dce5a5 uuid
if [ -f /Extra/DSDT.aml ]; then
acpi -e /Extra/DSDT.aml
fi
xnu_kernel /mach_kernel boot-uuid=${uuid} rd=*uuid
if [ /System/Library/Extensions.mkext -nt /System/Library/Extensions ]; then
xnu_mkext /System/Library/Extensions.mkext
else
xnu_kextdir /System/Library/Extensions
fi
if [ -f /Extra/Extensions.mkext ]; then
xnu_mkext /Extra/Extensions.mkext
fi
if [ -d /Extra/Extensions ]; then
xnu_kextdir /Extra/Extensions
fi
if [ -f /Extra/devprop.bin ]; then
xnu_devprop_load /Extra/devprop.bin
fi
if [ -f /Extra/splash.jpg ]; then
insmod jpeg
xnu_splash /Extra/splash.jpg
fi
if [ -f /Extra/splash.png ]; then
insmod png
xnu_splash /Extra/splash.png
fi
if [ -f /Extra/splash.tga ]; then
insmod tga
xnu_splash /Extra/splash.tga
fi
fi
}menuentry “Mac OS X (64-bit) (on /dev/sda5)” {
insmod part_msdos
insmod hfsplus
set root='(hd0,msdos5)’
search –no-floppy –fs-uuid –set fafd580685dce5a5
load_video
set do_resume=0
if [ /var/vm/sleepimage -nt10 / ]; then
if xnu_resume /var/vm/sleepimage; then
set do_resume=1
fi
fi
if [ $do_resume = 0 ]; then
xnu_uuid fafd580685dce5a5 uuid
if [ -f /Extra/DSDT.aml ]; then
acpi -e /Extra/DSDT.aml
fi
xnu_kernel64 /mach_kernel boot-uuid=${uuid} rd=*uuid
if [ /System/Library/Extensions.mkext -nt /System/Library/Extensions ]; then
xnu_mkext /System/Library/Extensions.mkext
else
xnu_kextdir /System/Library/Extensions
fi
if [ -f /Extra/Extensions.mkext ]; then
xnu_mkext /Extra/Extensions.mkext
fi
if [ -d /Extra/Extensions ]; then
xnu_kextdir /Extra/Extensions
fi
if [ -f /Extra/devprop.bin ]; then
xnu_devprop_load /Extra/devprop.bin
fi
if [ -f /Extra/splash.jpg ]; then
insmod jpeg
xnu_splash /Extra/splash.jpg
fi
if [ -f /Extra/splash.png ]; then
insmod png
xnu_splash /Extra/splash.png
fi
if [ -f /Extra/splash.tga ]; then
insmod tga
xnu_splash /Extra/splash.tga
fi
fi
}
=== End : Default boot loader Mac OS X Mavericks 10.9.1 : ======= Start : Default boot loader Mac OS X Mavericks 10.8.2 : ====
menuentry “Mac OS X (32-bit) (on /dev/sda6)” {
insmod part_msdos
insmod hfsplus
set root='(hd0,msdos6)’
search –no-floppy –fs-uuid –set 8d3a4355afbb9a21
load_video
set do_resume=0
if [ /var/vm/sleepimage -nt10 / ]; then
if xnu_resume /var/vm/sleepimage; then
set do_resume=1
fi
fi
if [ $do_resume = 0 ]; then
xnu_uuid 8d3a4355afbb9a21 uuid
if [ -f /Extra/DSDT.aml ]; then
acpi -e /Extra/DSDT.aml
fi
xnu_kernel /mach_kernel boot-uuid=${uuid} rd=*uuid
if [ /System/Library/Extensions.mkext -nt /System/Library/Extensions ]; then
xnu_mkext /System/Library/Extensions.mkext
else
xnu_kextdir /System/Library/Extensions
fi
if [ -f /Extra/Extensions.mkext ]; then
xnu_mkext /Extra/Extensions.mkext
fi
if [ -d /Extra/Extensions ]; then
xnu_kextdir /Extra/Extensions
fi
if [ -f /Extra/devprop.bin ]; then
xnu_devprop_load /Extra/devprop.bin
fi
if [ -f /Extra/splash.jpg ]; then
insmod jpeg
xnu_splash /Extra/splash.jpg
fi
if [ -f /Extra/splash.png ]; then
insmod png
xnu_splash /Extra/splash.png
fi
if [ -f /Extra/splash.tga ]; then
insmod tga
xnu_splash /Extra/splash.tga
fi
fi
}menuentry “Mac OS X (64-bit) (on /dev/sda6)” {
insmod part_msdos
insmod hfsplus
set root='(hd0,msdos6)’
search –no-floppy –fs-uuid –set 8d3a4355afbb9a21
load_video
set do_resume=0
if [ /var/vm/sleepimage -nt10 / ]; then
if xnu_resume /var/vm/sleepimage; then
set do_resume=1
fi
fi
if [ $do_resume = 0 ]; then
xnu_uuid 8d3a4355afbb9a21 uuid
if [ -f /Extra/DSDT.aml ]; then
acpi -e /Extra/DSDT.aml
fi
xnu_kernel64 /mach_kernel boot-uuid=${uuid} rd=*uuid
if [ /System/Library/Extensions.mkext -nt /System/Library/Extensions ]; then
xnu_mkext /System/Library/Extensions.mkext
else
xnu_kextdir /System/Library/Extensions
fi
if [ -f /Extra/Extensions.mkext ]; then
xnu_mkext /Extra/Extensions.mkext
fi
if [ -d /Extra/Extensions ]; then
xnu_kextdir /Extra/Extensions
fi
if [ -f /Extra/devprop.bin ]; then
xnu_devprop_load /Extra/devprop.bin
fi
if [ -f /Extra/splash.jpg ]; then
insmod jpeg
xnu_splash /Extra/splash.jpg
fi
if [ -f /Extra/splash.png ]; then
insmod png
xnu_splash /Extra/splash.png
fi
if [ -f /Extra/splash.tga ]; then
insmod tga
xnu_splash /Extra/splash.tga
fi
fi
}
=== End : Default boot loader Mac OS X Mavericks 10.8.2 : ====Change Become :
=== Start : Default boot loader Mac OS X Mavericks 10.9.1 : ====
menuentry “Mac OS X Mavericks 10.9.1 (on /dev/sda5)” {
insmod hfsplus
set root='(hd0,msdos5)’
multiboot /boot
}
=== End : Default boot loader Mac OS X Mavericks 10.9.1 : ======= Start : Default boot loader Mac OS X Mavericks 10.8.2 : ====
menuentry “Mac OS X Lion 10.8.2 (on /dev/sda6)” {
insmod hfsplus
set root='(hd0,msdos6)’
multiboot /boot
}
=== End : Default boot loader Mac OS X Mavericks 10.8.2 : ==== - Save “/boot/grub/grub.cfg” and then try to boot on Mac OS X. Enjoy. 😀
- Finish.


By DistroMac
Big Thanks to Linux Mint. 😀
Preview 2 (Install GarageBand On Mac OS X Mavericks 10.9.1 On Asus A46C) :

Install GarageBand On Mac OS X Mavericks 10.9.1 On Asus A46C

[Solved] Install Mac OS X Mavericks 10.9.1 On Asus A46C / A46CM / K46CM [Hackintosh]
Hi All people and students in the worlds, after we finishing to install Mac OS X Lion 10.8.2 On my Notebook Asus A46C / A46CM / K46CM, so at this point we also have done / completed install Mac OS X 10.9.1 Mavericks On Asus A46C / A46CM / K46CM. Step by step installation is very easy and simple, and we do this on the sidelines of free time and vacation time at Indonesia Country at “Kota Dingin (Ongis Nade) City”. Here’s a tutorials “[Solved] Tutorial Install Mac OS X Mavericks 10.9.1 On Asus A46C / A46CM / K46CM [Hackintosh]” from us and hope this can be useful for all. 😀

Screen Shot About This Mac 10.9.1 On Asus A46C II_
[Solved] Tutorial Install Mac OS X Mavericks 10.9.1 On Asus A46C / A46CM / K46CM [Hackintosh] :
( For the early time, you must prepare / utilize a “Wireless USB Mouse”. 😀 )
- Step 1st till step 3th it’s as same like on tutorial “ b. Trick Install Mac OS X Lion 10.8.2 On Asus A46C / A46CM / K46CM [Hackintosh] at [Solved] Install Mac OS X Lion 10.8.2 On Asus A46C / A46CM / K46CM [Hackintosh]”.
- After you create USB Flash Disk / Drive of OS X 10.9.1 Install “myHack 3.3.1.dmg + Install OS X Mavericks”. May be in installation process, you can’t install with warning error “The OS installation couldn’t be completed”, Like This (I’m take picture from my phone, sorry if it’s not good brightness for eyes. 😀 ) :
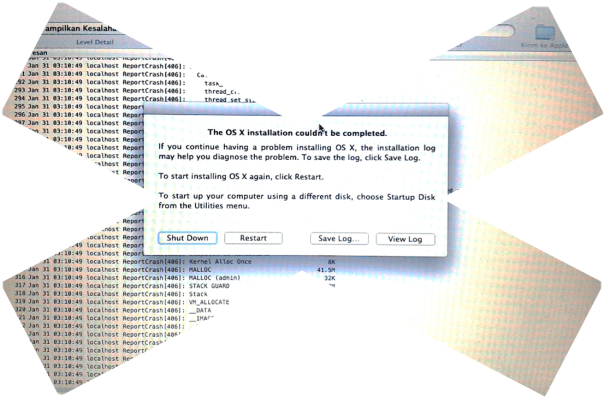
The OS installation couldn’t be completed On Mac OS X Mavericks 10.9.1
but it’s okey, try using bootflag “-v –x GraphicsEnabler=No” (Without quote sign).
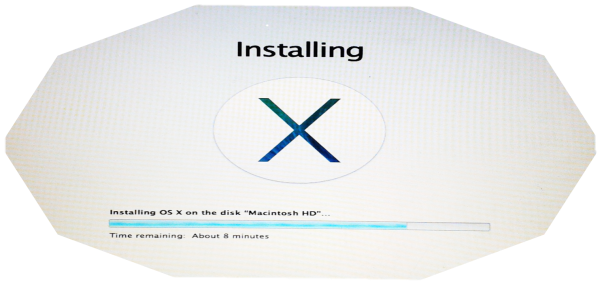
Installing Mac OS X Mavericks 10.9.1 on the disk
Wait for few minutes to finishing installation Mac OS X Mavericks 10.9.1, then boot using flag “-v –x GraphicsEnabler=No” (Without quote sign).
- Then create user & password to login on Mac OS X Mavericks 10.9.1.
- Delete all file with prefix “NV” kext on (S/L/E/NV…..kext) or (S/L/E/ATI…..kext) or (S/L/E/Geforce…..kext) or (S/L/E/AMDRadeon…..kext) or (System/Library/Extensions/NV…..kext) .
- Then login using this bootflag (It’s not stuck, wait -+ 10 minutes) :
>> -v GraphicsEnabler=No
or
>> -v –f GraphicsEnabler=No
or
>> -v –f
or
>> -fNote : -f to solved problem like this :
![Error or Stuck On [IOBluetoothHCIController] protectedBluetoothHCIControllerTransportShowUp flow divert kctl disconnect (0)](https://distromac.files.wordpress.com/2014/02/error-or-stuck-on-iobluetoothhcicontroller-protectedbluetoothhcicontrollertransportshowup-flow-divert-kctl-disconnect-0.png?w=604&h=296)
Error or Stuck On [IOBluetoothHCIController] protectedBluetoothHCIControllerTransportShowUp flow divert kctl disconnect (0)
Solved 1, “[IOBluetoothHCIController][protectedBluetoothHCIControllerTransportShowUp] – Connected to the transport successfully – 0x2240 — ….. **** ”.
Solved 2, “flow divert kctl disconnect (0): disconnecting group 1”. - After you login, may be you audio and VGA not working. To solved this, try to install with “Kext Helper b7” this file all (One by one or “drag and drop all kext files”) :
>> AppleACPIPlatform.kext
>> AppleHDA.kext
>> AppleIntelCPUPowerManagement.kext
>> ApplePS2Controller.kext
>> ApplePS2ElanTouchpad.kext
>> ar9285.pkg (Install without “Kext Helper b7”, it’s only use double click).
>> AsusNBWMI.kext
>> DisableTurboBoostBattery.kext
>> RealtekR1000SL.kext
>> VoodooHDA-v2.8.4.pkg (Install without “Kext Helper b7”, it’s only use double click).
>> SleepEnabler.kext
>> GenericUSBXHCI.kext
>> ACPIBatteryManager.kextThen delete folder “Extra” on Local Drive Mac OS X, then copy folder “Extra” from our blog, copy on your Local Drive Mac OS X. Link Download All File kext & folder “Extra” On link Here :
<<To Upload Tutorial 10.9.1 on distroMac [Solved].zip>>
Size : 46.2 MB
Hint : “After Download it, To Extract File (To Upload Tutorial 10.9.1 on distroMac [Solved].zip), you must Rename Extension *.doc to *.zip”
 .
. - Then login again using this bootflag (It’s not stuck, wait -+ 10 minutes) :
>> -v GraphicsEnabler=No
or
>> -v –f GraphicsEnabler=No
or
>> -v –f
or
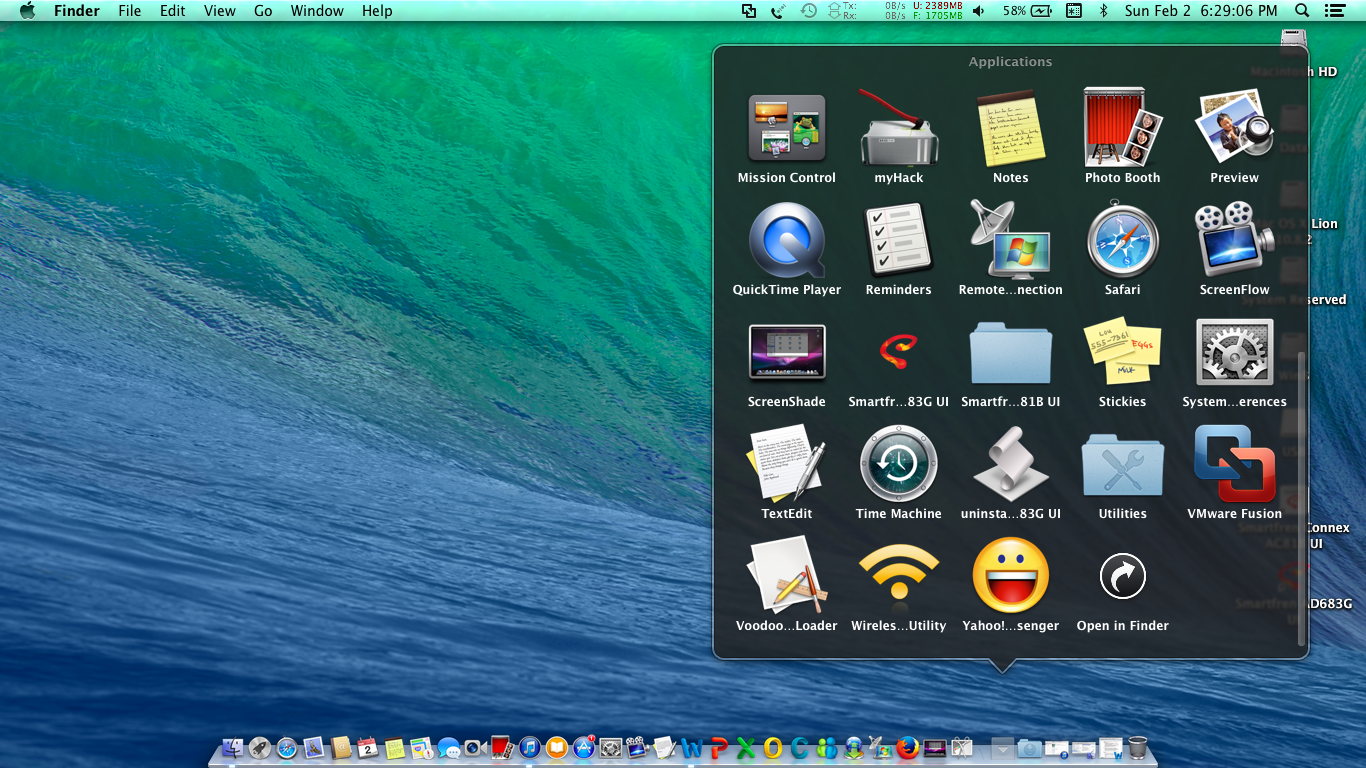
>> -f - To enable boot without boot flag anything, try to install from run “Applications/myHack”.
>> Run myFix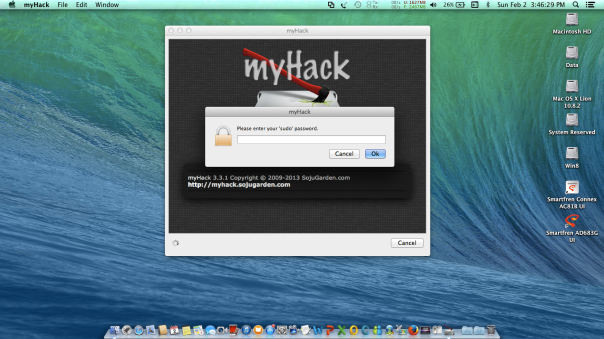
Run myHack I (Enter sudo password)
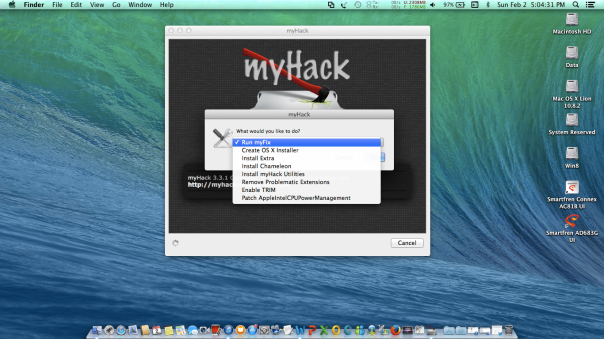
Run myHack II (What would you like to do)
Select target volume to run myhack on ..
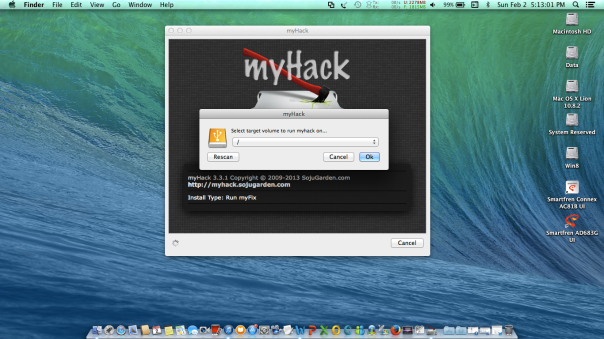
Run myHack III (Select target volume to run myhack on current drive Mac)
Then click “ok”.
>> Install Chameleon
>> Install myHack Utilities
>> Remove Problematic Extensions.
(If you want get 3 question “do you want to remove …. .kext”, please always click “No” Button).
>> Enable TRIM
>> Patch AppleIntelCPUPowerManagement - Boot again with this bootflag :
>> -v
or
without bootflag. Enjoy. 😀 - Finish.


![Error or Stuck On [IOBluetoothHCIController] protectedBluetoothHCIControllerTransportShowUp flow divert kctl disconnect (0)](https://distromac.files.wordpress.com/2014/02/error-or-stuck-on-iobluetoothhcicontroller-protectedbluetoothhcicontrollertransportshowup-flow-divert-kctl-disconnect-0.png)


By DistroMac
Big Thanks to :
http://www.osx86.net/files/download/3724-osinstallmbrosinstallmpkg-109x/
http://myhack.sojugarden.com/
Preview 1 :
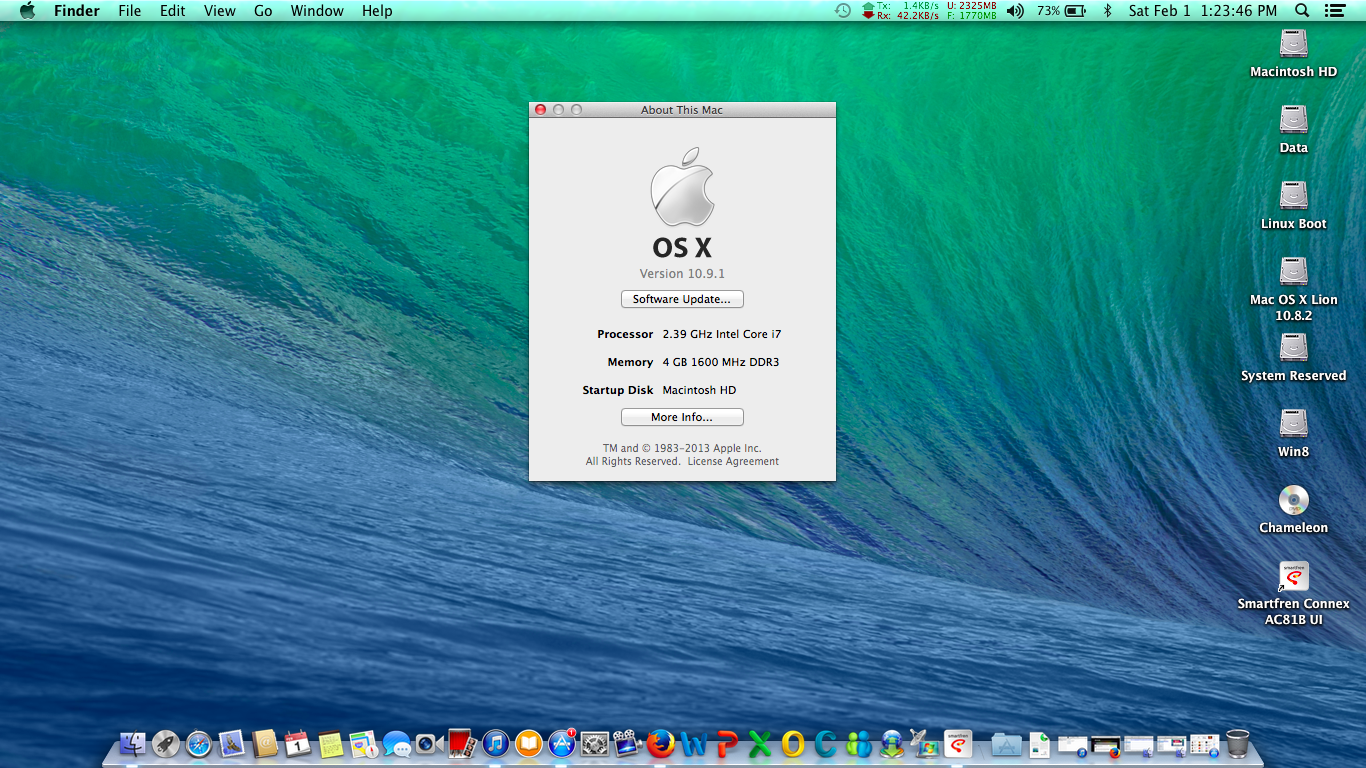
Screen Shot About This Mac 10.9.1 On Asus A46C
Preview 2 :
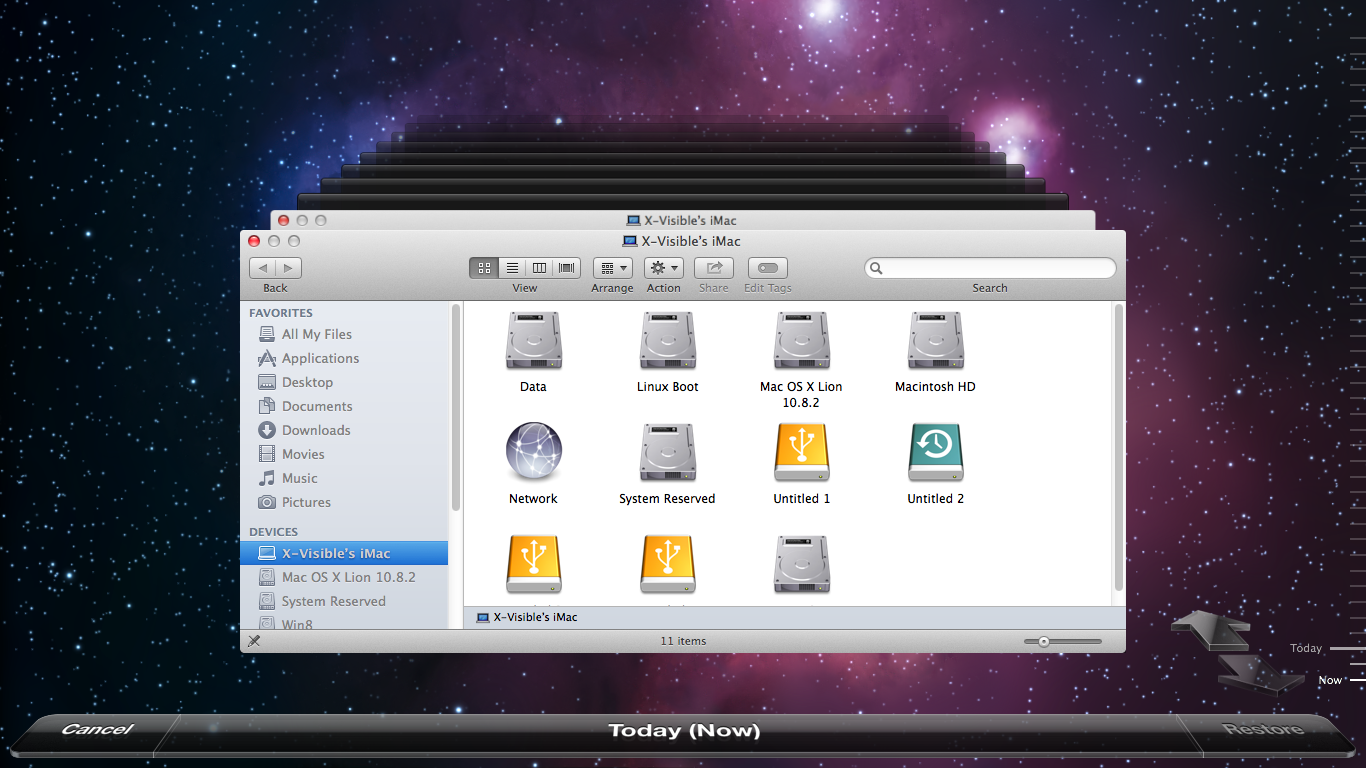
Enter Time Machine On Mac OS X 10.9.1 On Asus A46C I
Preview 3 :

Screen Shot App Store Mac 10.9.1 On Asus A46C _
Preview 4 :
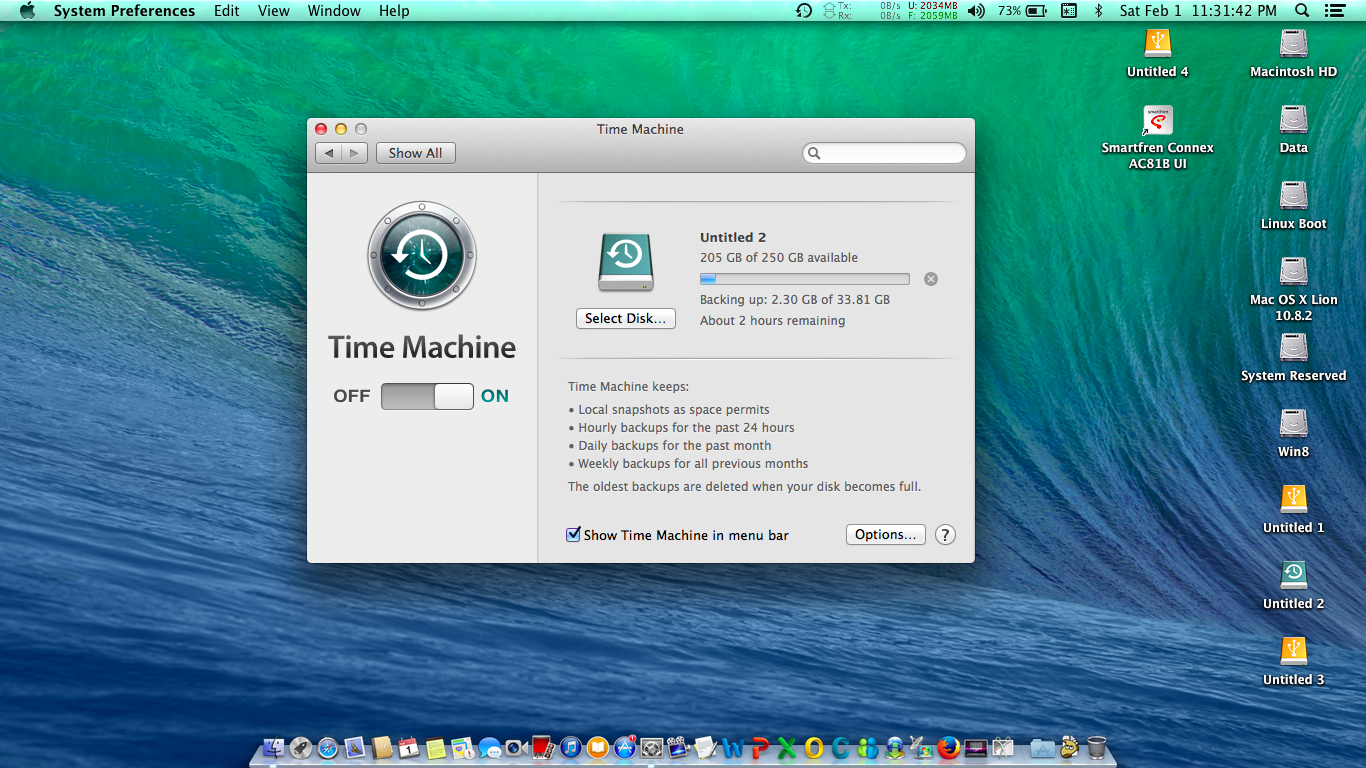
Backup Time Machine On Mac OS X 10.9.1 On Asus A46C I
[Solved] Create Installer USB Flash Disk / Drive Of Mac OS X Mavericks 10.9.1 (Retail / From App Store) with myHack On Asus A46C / A46CM / K46CM Part 2 of 2 [Hackintosh]
This is a continuation of the previous tutorial Part 1 of 2 “[Solved] Create Installer USB Flash Disk / Drive Of Mac OS X Mavericks 10.9.1 (Retail / From App Store) with myHack On Asus A46C / A46CM / K46CM Part 1 of 2 [Hackintosh]“. 😀
Part 2 of 2 (Create Installer Mac OS X Mavericks 10.9.1 with myHack) :
- Please utilize “your previous Mac OS X“ or “you can borrow Mac OS Computer of your friend” or “use VMware (Install Mac on this Virtual Machine, It’s very more simple, before install, you must change to enable virtualization technology on BIOS)” to running “myHack 3.3.1.dmg“.
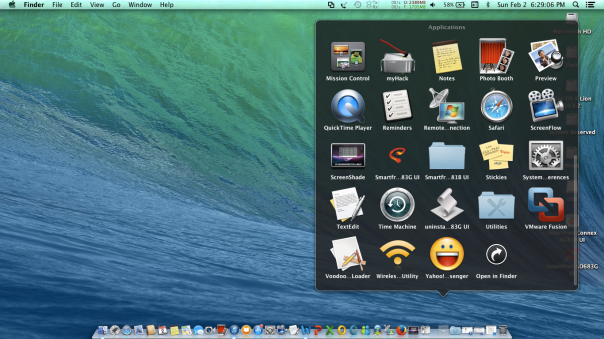
_ Run myHack 0 (Click myHack From Applications) On Asus A46C
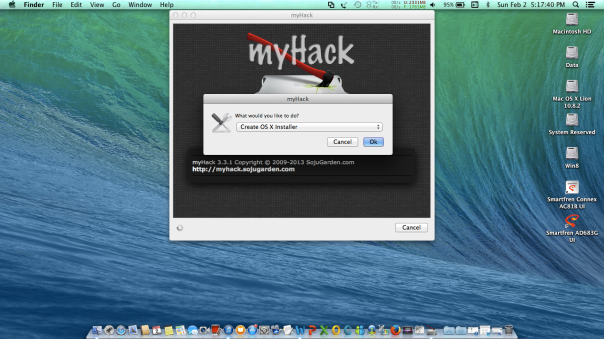
_ Run myHack I (Create OS X Installer 10.9.1) On Asus A46C
- Choose your install type… “Create OS X 10.9 Install Disk”.
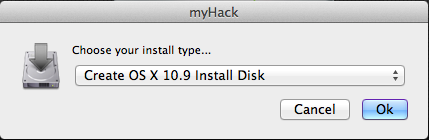
_ Run myHack II (Create OS X Installer 10.9.1 Install DIsk) On Asus A46C
- Select target volume to run myhack on…

_ Run myHack III (Select Volumes_USB) On Asus A46C
- Browse Manualy Installer OS X Mavericks 10.9.1 on your Disk.
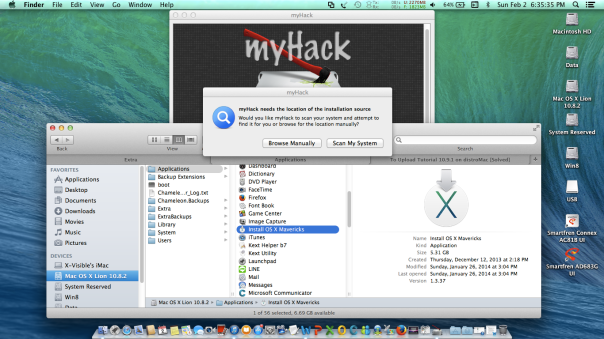
_ Run myHack IV (Browse Manualy Installer OS X Mavericks) On Asus A46C
- Ready to copy installation data to target, click “Ok”. And make sure your “Installer OS X Mavericks” is verified (pure download from App Store).
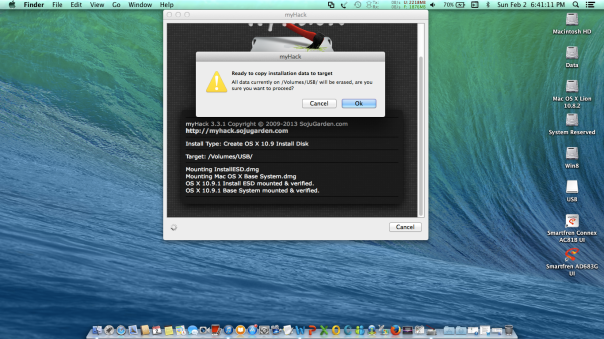
_ Run myHack V (Ready to copy data to target) On Asus A46C
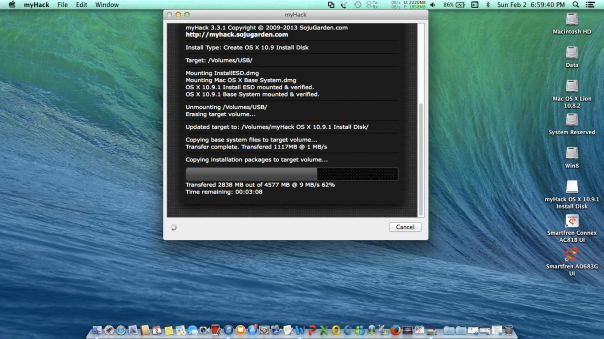
- Please wait for few time to complete processing installer on USB “myHack OS X 10.9.1 Install Disk”.
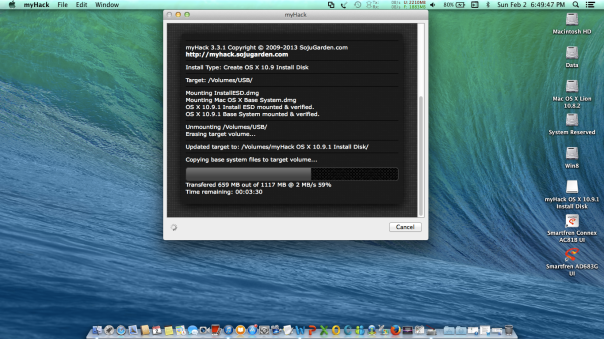
_ Run myHack VI (Processing Installer OS X Mavericks) On Asus A46C
- Would you like to patch installer for MBR support, click “Yes” (If It’s not working, don’t worry, try to replace file “OSInstall & OSInstall.mpkg” with file from download on our blog) after create installer it’s done.
_ Run myHack VII (Processing Installer OS X Mavericks) On Asus A46C
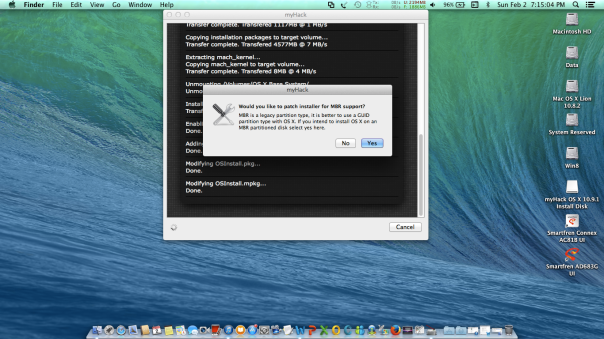
_ Run myHack VIII (Would you like to patch istaller for MBR Support) On Asus A46C
- After done (All processes is completed), click “Ok”, than click “Quit”.
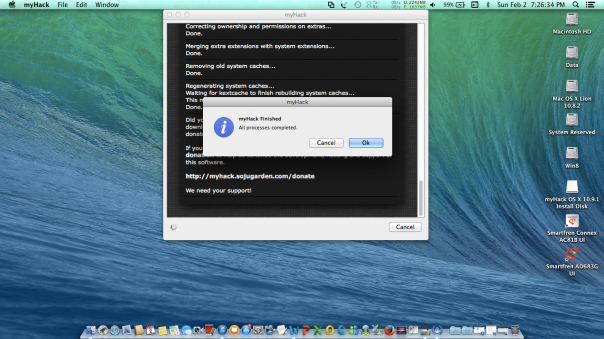
_ Run myHack IX (Processing Installer is Completed) On Asus A46C
- Boot using it “myHack OS X 10.9.1 Install Disk” (by USB). Enjoy. 😀
- Finish.


Release by DistroMac.
[Solved] Create Installer USB Flash Disk / Drive Of Mac OS X Mavericks 10.9.1 (Retail / From App Store) with myHack On Asus A46C / A46CM / K46CM Part 1 of 2 [Hackintosh]
Hi all, on this tutorials, we provide easy way “[Solved] Create Installer USB Flash Disk / Drive Of Mac OS X Mavericks 10.9.1 (Retail / From App Store) with myHack On Asus A46C / A46CM / K46CM [Hackintosh]” we divide to be two section/ 2 part. ( Note : If you don’t have Installer Mac OS X Mavericks 10.9.1 (Retail / From App Store), Google is your friend. 😀 ). “Big thanks to Google, Apple Store & myHack”.
Part 1 0f 2 (Trick USB Partition) :
- Prepare USB Stick (-+ 8 till 16 GB) and erase it.
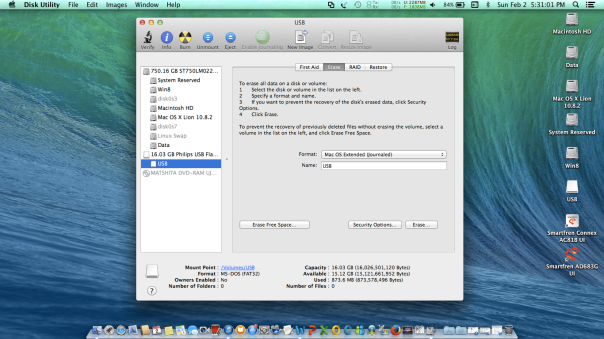
Run Disk Utility I (Erase with Format USB if it’s still any containing files and not yet utilize “Mac OS Extended (Journaled) Format”) On Asus A46C
- Create partition on USB (-+ 8 till 16 GB), Click “… Flash Drive Media”.
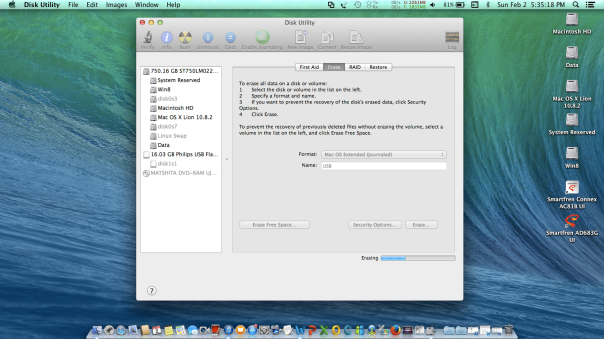
Run Disk Utility II (Erasing) On Asus A46C
- Click Tab Partition, Choose Partition Layout : “1 Partition”, Name : “USB”, Format “Mac OS Extended (Journaled)”.
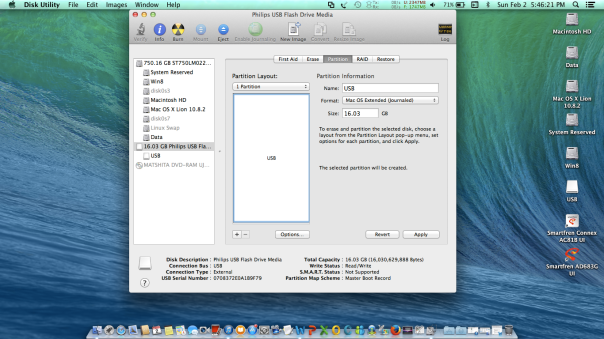
Run Disk Utility III (Partition) On Asus A46C
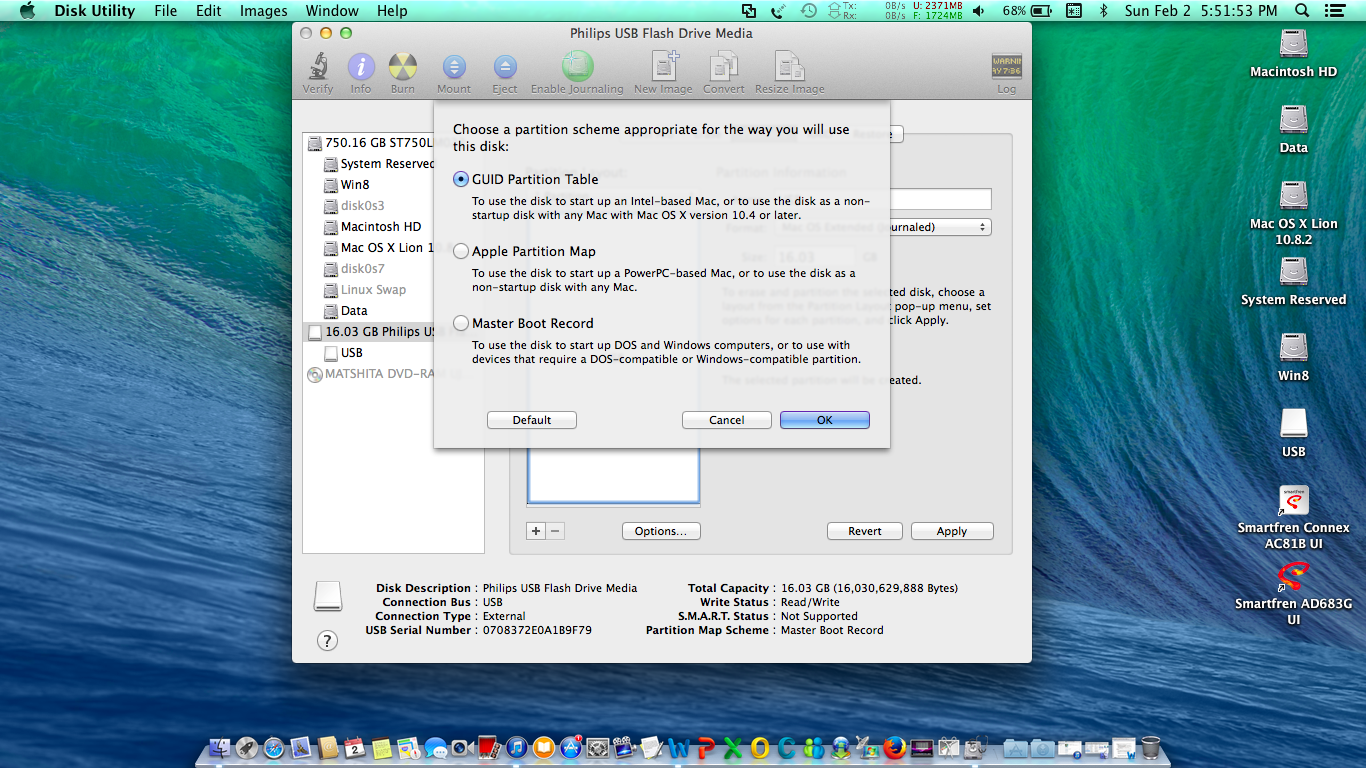
- On Partition Layout, click “Options…” button. Choose one, “GUID Partition Table” or “Master Boot Record”, both it’s okey. Then click “OK”.
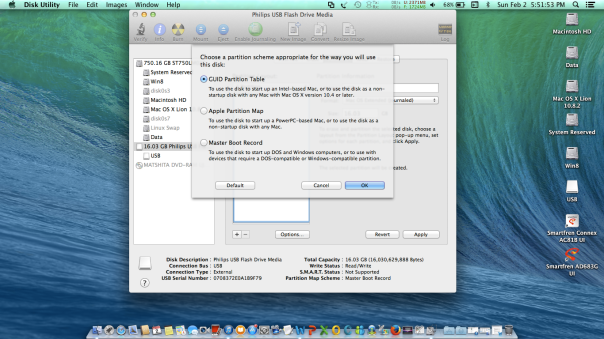
Run Disk Utility IV (Choose Partition Scheme) On Asus A46C
- Then, click “Apply” button, at the confirm click “Partition” button.
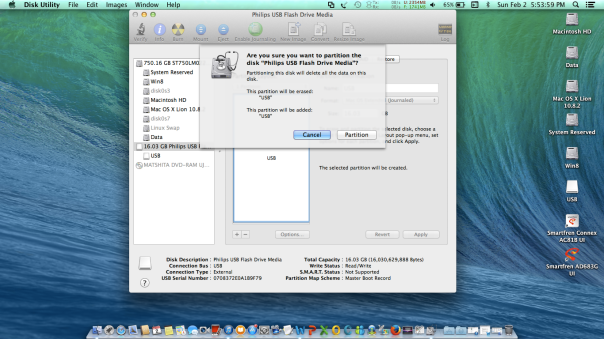
Run Disk Utility V (Confirm Partition) On Asus A46C
- Please wait for few time, till done partition process.
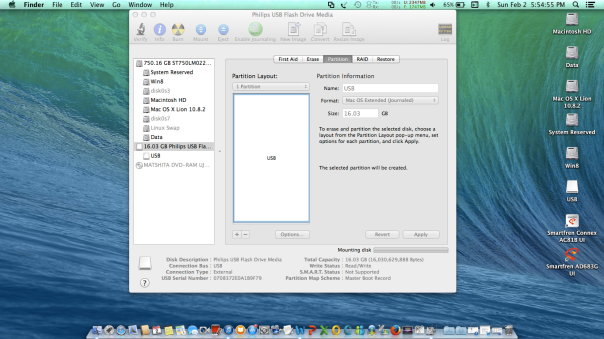
Run Disk Utility VI (Processing Partition, Please Wait) On Asus A46C
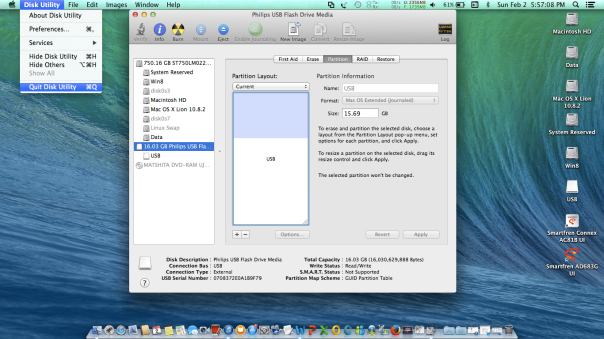
Run Disk Utility VII (Quit Disk Utility) On Asus A46C
- To be continue at Part 2 of 2 [Solved] Create Installer USB Flash Disk / Drive Of Mac OS X Mavericks 10.9.1 (Retail / From App Store) with myHack On Asus A46C / A46CM / K46CM Part 2 of 2 [Hackintosh].


Release by DistroMac.
[Solved] Install Mac OS X Lion 10.8.2 On Asus A46C / A46CM / K46CM [Hackintosh]
On this occasion, we will provide an explanation of our experience that we have done, that about “[Solved] Install Mac OS X Lion 10.8.2 On the Asus A46C / A46CM / K46CM [Hackintosh]”. Hopefully this will help all people who likes to do new things that is rarely do for other people, an example is we are running Mac OS X Lion 10.8 on PC computers. ![]() Well, we are here using the Asus A46C, here’s his review (“a. Spesification of Asus A46C / A46CM / K46CM” & “b. Trick Install Mac OS X Lion 10.8.2 On Asus A46C / A46CM / K46CM [Hackintosh]”) :
Well, we are here using the Asus A46C, here’s his review (“a. Spesification of Asus A46C / A46CM / K46CM” & “b. Trick Install Mac OS X Lion 10.8.2 On Asus A46C / A46CM / K46CM [Hackintosh]”) :

About This Mac 10.8.2 On Asus A46C
a. Spesification of Asus A46C / A46CM / K46CM :
- [ Processors / Intel(R) Core(TM) i7-3517U CPU @ 1.90GHz ]
Processor Properties:
Manufacturer Intel(R) Corporation
Version Intel(R) Core(TM) i7-3517U CPU @ 1.90GHz
- Display:
Video Adapter Intel(R) HD Graphics 4000 (1455852 KB)
Video Adapter NVIDIA GeForce GT 635M (2048 MB)
Monitor Generic PnP Monitor [NoDB]
- [ On-Board Devices / USB 2.0 Controller ]
On-Board Device Properties:
Description USB 2.0 Controller
Status Enabled
- [ On-Board Devices / USB 3.0 Controller ]
On-Board Device Properties:
Description USB 3.0 Controller
Status Enabled
- [ Qualcomm Atheros AR9485WB-EG Wireless Network Adapter ]
Network Adapter Properties:
Network Adapter Qualcomm Atheros AR9485WB-EG Wireless Network Adapter
Interface Type 802.11 Wireless Ethernet
Hardware Address DC-85-DE-A0-09-E7
Connection Name Wi-Fi
- [ Realtek RTL8168/8111 PCI-E Gigabit Ethernet Adapter ]
Device Properties:
Device Description Realtek RTL8168/8111 PCI-E Gigabit Ethernet Adapter
Bus Type PCI Express 2.0 x1

myHack 10.8.2 on Asus A46C Core i7 [Hackintosh]
- Setting Bios, like this :
>> USB : Legacy Enabled
>> XHCI : Disabled
>> Disable Virtualization Technology
>> Disabled VT-d
Then, save using F10, and boot again. - Using “myHack-3.3.dmg” + “Mac Lion Retail 10.8.2” to create bootable by USB.
To view detail step by step, visit this link at our blog “[Solved] Create Installer USB Flash Disk / Drive Of Mac OS X Mavericks 10.9.1 (Retail / From App Store) with myHack On Asus A46C / A46CM / K46CM Part 1 of 2 [Hackintosh]” or please search on youtube with keyword “myhack”. - After create bootable USB with “myHack”,
>> OSInstall.mpkg replace to
/System/Installation/Packages/OSInstall.mpkg
>> OSInstall replace to
/System/Library/PrivateFrameworks/Install.framework/Frameworks/OSInstall.framework/Versions/A/OSInstallsource link : “http://www.osx86.net/files/file/1129-osinstallmbrosinstallmpkg-108x/”. Thanks osx86.net
Note : This is to enable install bootable USB from “myHack” to MBR partition on Windows OS. So don’t need using GTP (GUID Table Partition). - Install Mac OS X Lion 10.8.2 by USB with this bootflag (try one by if you want to success) :
>> -v -x
or
>> -v -x GraphicsEnabler=No
or
>> -v -x npci=0x2000 GraphicsEnabler=No
or
>> -v -x npci=0x2000 GraphicsEnabler=No cpus=1 PCIRootUID=0
or
>> -v
or
>> -v GraphicsEnabler=No
or
>> -v npci=0x2000 GraphicsEnabler=No
or
>> -v npci=0x2000 GraphicsEnabler=No cpus=1 PCIRootUID=0Note : When installing after -+ 20 minutes, myHack will be prompt box pop up.
First, you can choose My Own and the navigate to the “USB myHack OS X Installer” and select the Extra Folder that located on the drive.
and then,
There will be 3 more pop up box appear. You may always select “No” for each one as i saw not will effects from using those kexts. - After finish install, prompt with this bootflag On Safe Mode (It’s not stuck, wait -+ 10 minutes) :
>> -v -x GraphicsEnabler=No
Then create user & password to login on Mac OS X Lion 10.8.2 - Delete all file with prefix “NV” kext on (S/L/E/NV…..kext) or (System/Library/Extensions/NV…..kext).
- Then login using this bootflag (It’s not stuck, wait -+ 10 minutes) :
>> -v GraphicsEnabler=No - After you login, may be you audio and VGA not working. To solved this, try to install with “Kext Helper b7” this file all (One by one) :
>> AppleACPIPlatform.kext
>> AppleHDA.kext
>> AppleIntelCPUPowerManagement.kext
>> ApplePS2Controller.kext
>> ApplePS2ElanTouchpad.kext
>> ar9285.pkg (Install without “Kext Helper b7”, it’s only use double click).
>> AsusNBWMI.kext
>> DisableTurboBoostBattery.kext
>> RealtekR1000SL.kext
>> VoodooHDA-v2.8.4.pkg (Install without “Kext Helper b7”, it’s only use double click).
>> SleepEnabler.kext
>> GenericUSBXHCI.kextThen delete folder “Extra” on Local Drive Mac OS X, then copy folder “Extra” from my blog, copy on Local Drive Mac OS X.
Link Download All File kext On Here <<To Upload on distroMac [Solved].zip>> Size : 43.6 MB
Hint : “After Download it, To Extract File (To Upload on distroMac [Solved].zip), you must Rename Extension *.doc to *.zip”. - Boot again with this bootflag :
>> -v
or
without bootflag. Enjoy. 😀 - Finish.
Hope this helpful and have sweet day. 😀
By DistroMac
Big Thanks to :
http://forum.osxlatitude.com/index.php?/topic/2676-asus-k46ca-k46cm-k56ca-k56cm-tutorial-mountain-lion-1082/
http://myhack.sojugarden.com/

My Desk myHack 10.8.2 On Asus A46C [Hackintosh]
The Next (Prepare) : Upgrade Myhack 10.8.2 to Mavericks By Apple Store I [Hackintosh]

The Next (Prepare) : Upgrade Myhack 10.8.2 to Mavericks By Apple Store II [Hackintosh]
Build and Create Simple Mac App StopWatch Using Xcode 4.3.3 on Mac Lion 10.7.4 [Hackintosh]
On this night, right after our vacation to Mount Bromo on the 1st December 2012 with some friends from Indonesia, Taiwan, Japan, Berlin and Myanmar, hopefully not wrong mention. 🙂 We again want to share, and sharing knowledge that this time the theme creation program Stopwatch with easy. This program is not the first time made, but has been developed previously by many people. One of our references are from: http://www.youtube.com/watch?v=nCu0DyJ9wcg (Uploaded by CyttilDalionzo on Mar 19, 2011). Let’s go to hunt this tutorial below :
Display My Xcode Coding :
Display My Xcode Coding StopWatch
Display MainMenu.xib :

Display MainMenu.xib StopWatch
Display AppDelegate.m part 1 of 2 :
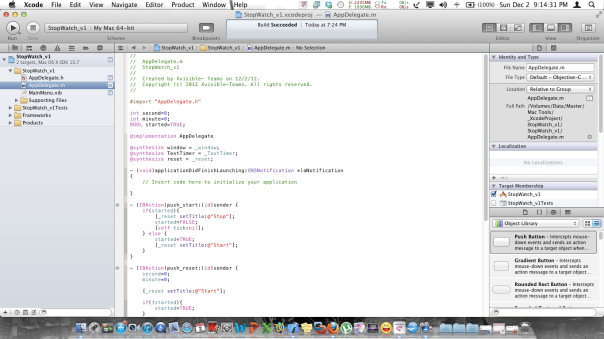
Display AppDelegate.m StopWatch part 1
Display AppDelegate.m part 2 of 2 :
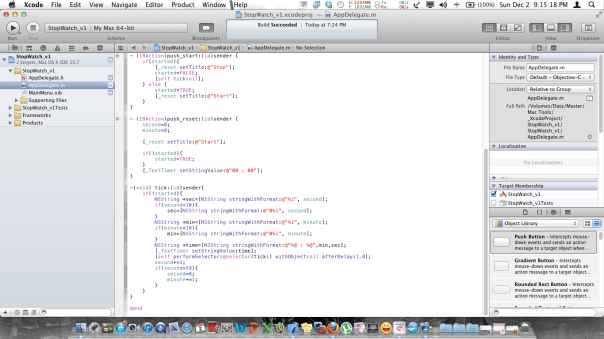
Display AppDelegate.m StopWatch part 2
Display AppDelegate.h :
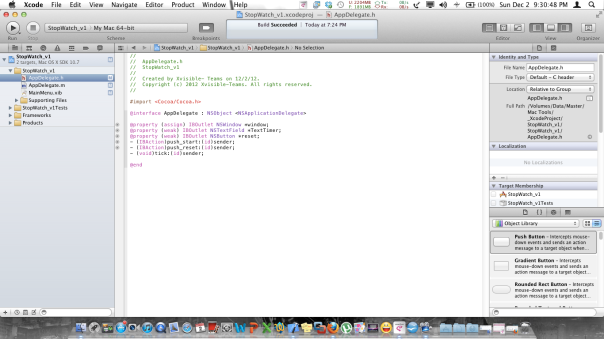
Display AppDelegate.h StopWatch
To See All Tutorial, Play This Video that has been upload on Youtube :
To download script/ code, Click link below :
Hint : “After Download it, To Extract File (Code Of Stopwatch.zip),
You must Rename Extension *.doc to *.zip” ![]() .
.
Release By DistroMac
Demos Installation DMG File After Created Using App2Dmg Tool Convert [Hackintosh]
Well, for a couple of weeks we did not make additions on the blog. But we will post now is the appearance of the installation of programs that have been created using the tool. Let’s Go!
- Double Click File “MyCounterAppIcon.dmg”.

Double Click File “MyCounterAppIcon.dmg”
- Display Mounted After Step One.

After Double Click File “MyCounterAppIcon.dmg”
- Drag and Drop to Install.

Drag and Drop to Install
- Right click, Then Click “Eject MyCounterAppIcon”.

Right click, Then Click “Eject MyCounterAppIcon”
- Click Folder Application, Then Click “MyCounterAppIcon”.

Click Folder Application, Then Click “MyCounterAppIcon”
- Or, Click LaunchPad, Then Click “MyCounterAppIcon”.

Click LaunchPad Then Click “MyCounterAppIcon”
- Finally, this is the view from “MyCounterAppIcon”.

Finally, this is the view from “MyCounterAppIcon”
- Finish.


Create Installer DMG File With Packaging Mac App Using Tool Convert .app to .dmg On Mac Lion 10.7.4 [Hackintosh]
Alhamdulillah, the four days after Eid, we try to present a special gift for lovers of Apple’s developer, in the form of methods and tools used to modify and package a Mac App that we have compiled and is very easy, fast, effective and efficient. Tool we use is free software, and we get it in the App Store. The tool provides several design and appearance of the installation form that is standard on Mac OS X. The greatness of this tool is able to make the installer a way to package the *.app to *.dmg. Okay, Let’s prove it by following these steps :
1. Download This Tool (App2Dmg). After download, rename extention file *.doc become *.dmg

Icon App2Dmg
2. Install file “App2Dmg.dmg

Install App2Dmg
3. Run “App2Dmg” On Applications

Run “App2Dmg” On Applications
4. Display “App2Dmg”

Display App2Dmg
5. Change background App2Dmg

Change background App2Dmg
6. Select an App file, Then Click “Open” Button

Select an App file
7. Select a Folder to Save, Then Click “Save” Button

Select a Folder to Save
8. Creating MyCounterAppIcon.dmg

Creating MyCounterAppIcon
9. Display MyCounterAppIcon

Display MyCounterAppIcon
10. Finish 🙂
Create and Put An Icon On Your Mac App That Has Been Create Using Xcode 4.3.3 On Mac Lion 10.7.4 [Hackintosh]
We want a little story, that on the day yesterday until last night we had an upset stomach due to eating late. 🙂
But no problem, hopefully the little things that happen to us or large, will not hinder us to share knowledge and goodness. Well, on this occasion we will share how to create and put an icon on the Mac App that we have created. Let’s Go!
1. Provide the image you want to use as icon.

Put Icon To MyCounterApp.app On Mac (file type *.png)
2. Convert all file type image (like *.png, *.jpg and so on) to *.icns
In doing convert these images, we use the tool on the website “http://iconverticons.com/app/”. Because of this “free” when we use it online. However, you can use other tools that might result and the quality can be better.
Online Icon Mac App Maker
Then Click “Use Online” Button.
Main Menu Icon Mac App Maker
Then Click “Browse” Button, Choose Your Image. Then Click “Convert” Button.

Converting Image Processing
Convertion Finished.

Conversion Finished
Then Download Your “Mac OS X Icon”.
Download Icon Mac
Open File Icon In Finder.

Location File Icon Show In Finder
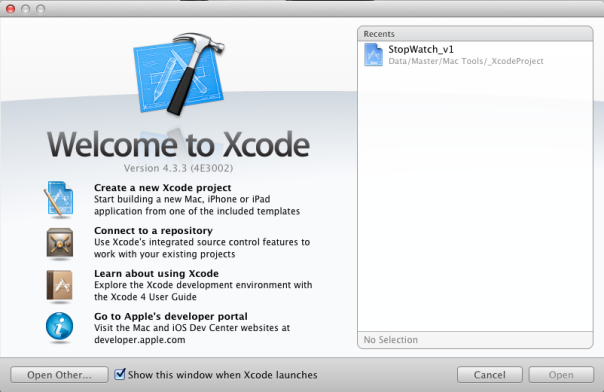
3. Open Xcode, Then Open “MyCounter” Project.

Open Xcode
4. On “TARGETS >> MyCounter >> Summary >> Mac OS X Application Target >> App Icon” Right Click. Select File, Then put your icon.

Select File Icon On Xcode
5. Choose Icon On Your Project.
File Icon Mac App
6. Display Icon On Your Project.
Display Icon Mac App
7. Compile Again Your Mac App. Then This Result :
Mac App With Icon.

Mac App With Icon
Mac App Without Icon.
Mac App Without Icon
8. Finish. 🙂
Compile Your Mac Apps That Has Been Created Using Xcode 4.3.3 on Mac Lion 10.7.4 [Hackintosh]
After making coding is complete and tested successfully, the next step is we will continue the process of “compiling”. Coding so that we make will be run independently. In Mac OS X Lion, the compiled file extension is “. app”, while the Window OS is . “exe”. The following steps will guide and lead you to reach the goal of becoming “Apple developer” from create simple Application :
1. MyCounter.xcodeproj On Xcode.

MyCounter.xcodeproj
2. Click “Product >> Archive”.

Click “Product >> Archive”
3. On “Organizer – Archives’, Click “Distribute” Button.

Organizer – Archives
4. Export as “Application”, Then “Next” Button.

Export as “Application”
5. On “Code Signing Identity” Choose You Want, Then Click “Next” Button.

On “Code Signing Identity”
6. On “Form Save As”, Give Your App Name. Then Click “Save” Button.

On “Form Save As”
7. This is Final Result of Compile Your Mac App “MyCounterApp”.

MyCounterApp
8. Get info Extension of “MyCounterApp”.

Extention Application On Mac OS is .app
9. To Run Your Application, Double Click “MyCounterApp”.

Double Click “MyCounterApp”
10. Finish. 🙂


